Simple Sautéd Collard Greens

vscocam-photo-12-e1432167393152.jpg

Often, when we think of collards in the South, the first image that comes to mind is of a large pot of greens cooked for hours with ham hocks and / or bacon. While these can be delicious, the long cooking time diminishes some of the natural nutritional value found in collards (not to mention being tough to accomplish on a busy weeknight!).  This recipe offers an alternative that increases both speed and nutritional value while maintaining the depth of flavor we all want in our collard greens. Processed with VSCOcam with m3 preset

Recipe adapted from Hugh Acheson's The Broad Fork

Ingredients:

1 lb. collard greens, ribs removed

2 garlic cloves, thinly shaved

1 tablespoon unsalted butter

1 medium yellow union, cut in small dice

Kosher salt, to taste

Fresh cracked black pepper, to taste

1 tablespoon molasses

2 tablespoons apple cider vinegar

IMG_2232


Method:

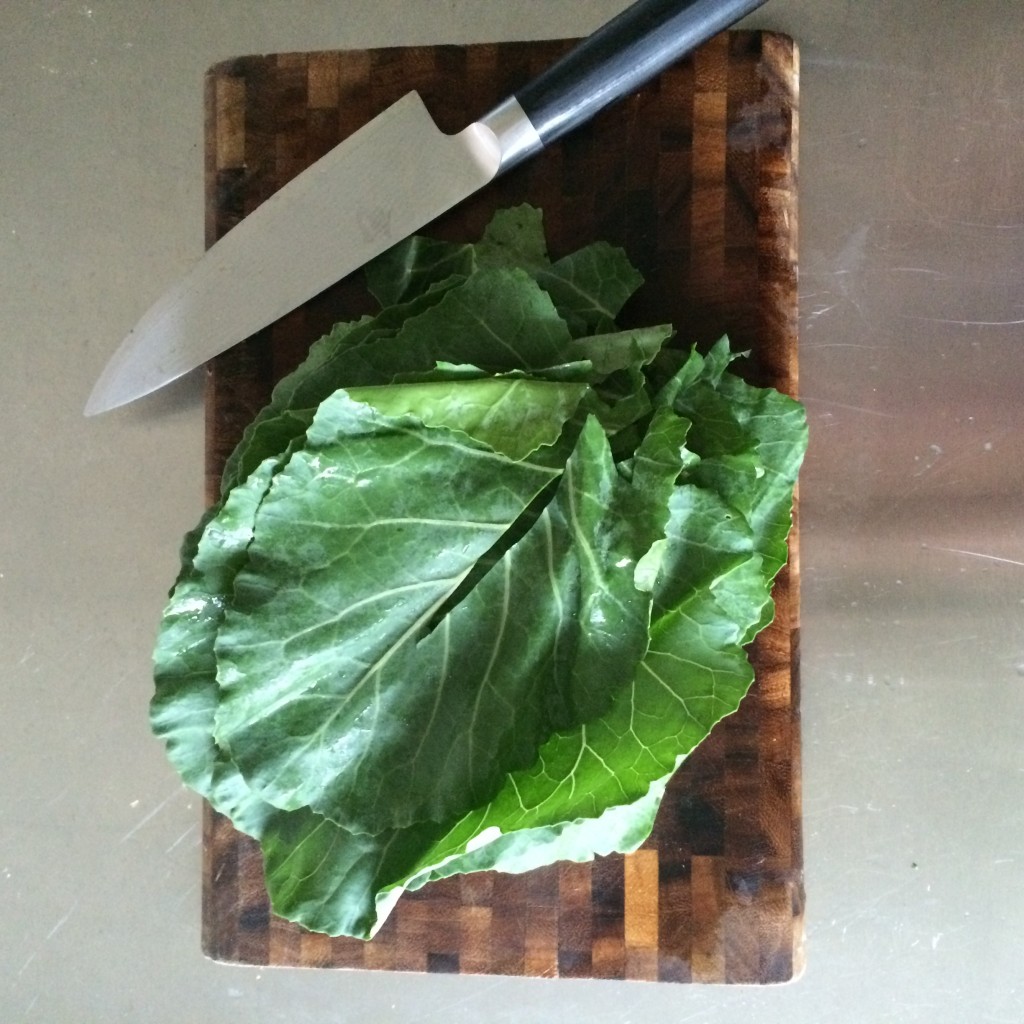
Stack the collard greens on top of each other, roll them up, and slice the roll into 1/2 inch wide strips. Submerge the greens in a bowl of cold water then transfer to a colander to drain. Once the collard greens have drained for a few minutes, lay them out on paper towels and dry completely.

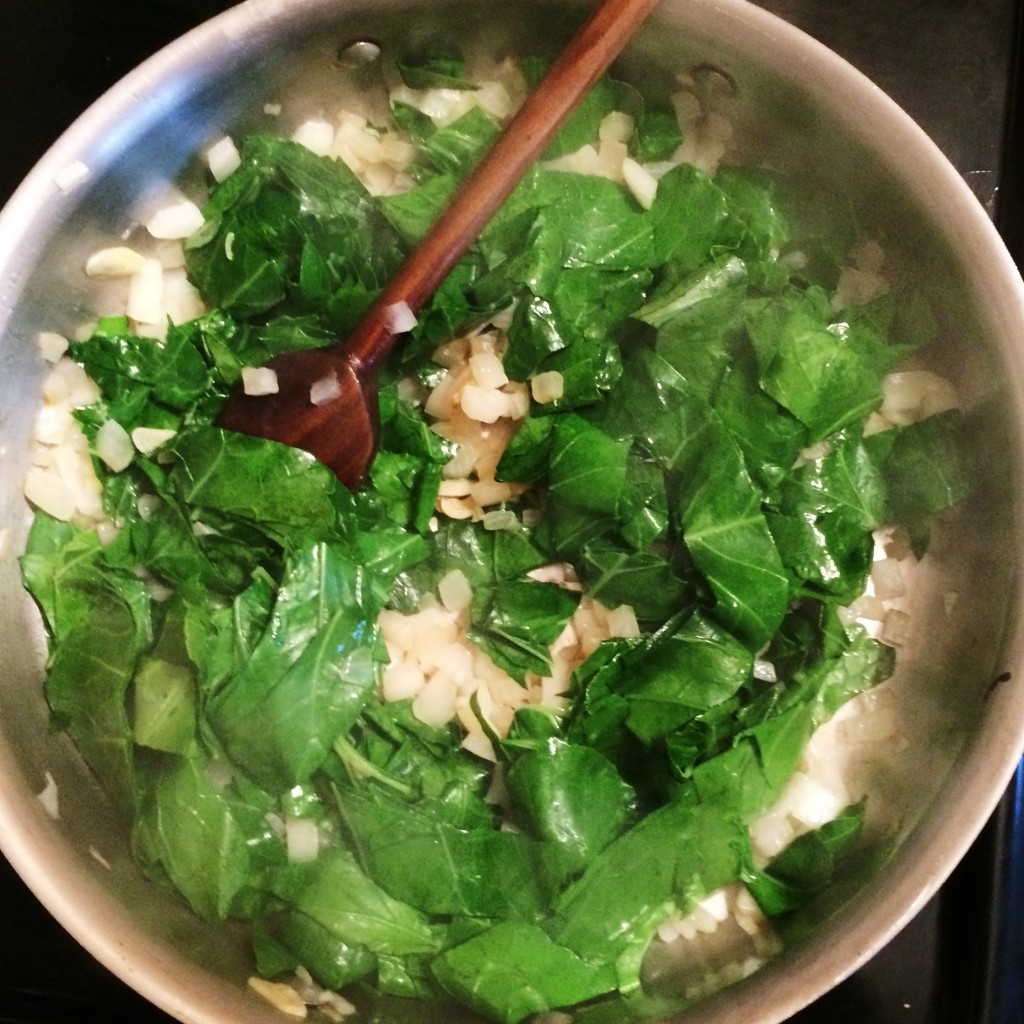
In a large sauté pan, slowly sweat the garlic in the butter over low to medium-low heat. When the garlic is very aromatic, add the onions. Season to taste with salt and pepper, and sweat for 15 minutes or until translucent and soft but not brown.

vscocam-photo-1

Raise the heat to medium, add the collard greens and cook, stirring occasionally, for 7-10 minutes, or until the start to soften. Stir in the molasses and cider vinegar and continue cooking for 10 more minutes, or until the collards are tender but still have some chew. Adjust seasoning with more kosher salt or pepper, as needed, and serve.

vscocam-photo-1

Winter Squash: How to prepare for recipes

IMGP9555.jpg

These fall beauties are not to be relegated to the tabletop as decorations.  They are meant to be peeled, chopped, roasted, steamed, or pureed.  Though they are not related, imagine them as large carrots or beets with thick skins, if you will.  Members of the winter squash family are delicious, naturally sweet, and full of dietary fiber, vitamins and minerals. If picked fresh from a green vine they would have a high starch content and less flavor.  Properly "cured" winter squash is left in the field until the vines have died, the stems have dried and hardened, and the squash skins have thickened.  The curing process continues after the harvest by leaving them in a dry window or counter top long enough to develop thicker, darker colored skins.  In this process the starches convert to sugars and the flavors become complex. Though the naturally thick, waxy skins are sometimes difficult to remove, they serve to preserve the squash for months on end.  If stored in a well-ventilated, dry place, and protected from getting cracks and bruises, they will continue to be delicious throughout the winter. Cool, but not cold storage is required, so feel free to decorate your kitchen while you are saving extras for the winter months.  Click here for more information about the curing process.

Some winter squash have thinner, more edible skins.  Delicata squash, for example, does not generally last as long as a butternut squash or pumpkin, but the skins are lovely and soft when cooked. Although natural sugars are a highlight to winter squash, they are perfect additions to a variety of both sweet and savory dishes.

There are many ways to prepare winter squash for recipes, and how you choose to prepare them may depend on the variety or the recipe.  Before you begin, a couple of helpful kitchen tools to have are: 1) A sharp, good sized cooks knife or santoku knife.  2) A non-slip cutting board.  


Squash Puree: Three Ways (commonly used for muffins, cakes, pies, custards, etc.)

IMGP9562

Baked (Best method for acorn or other deeply ridged squash):

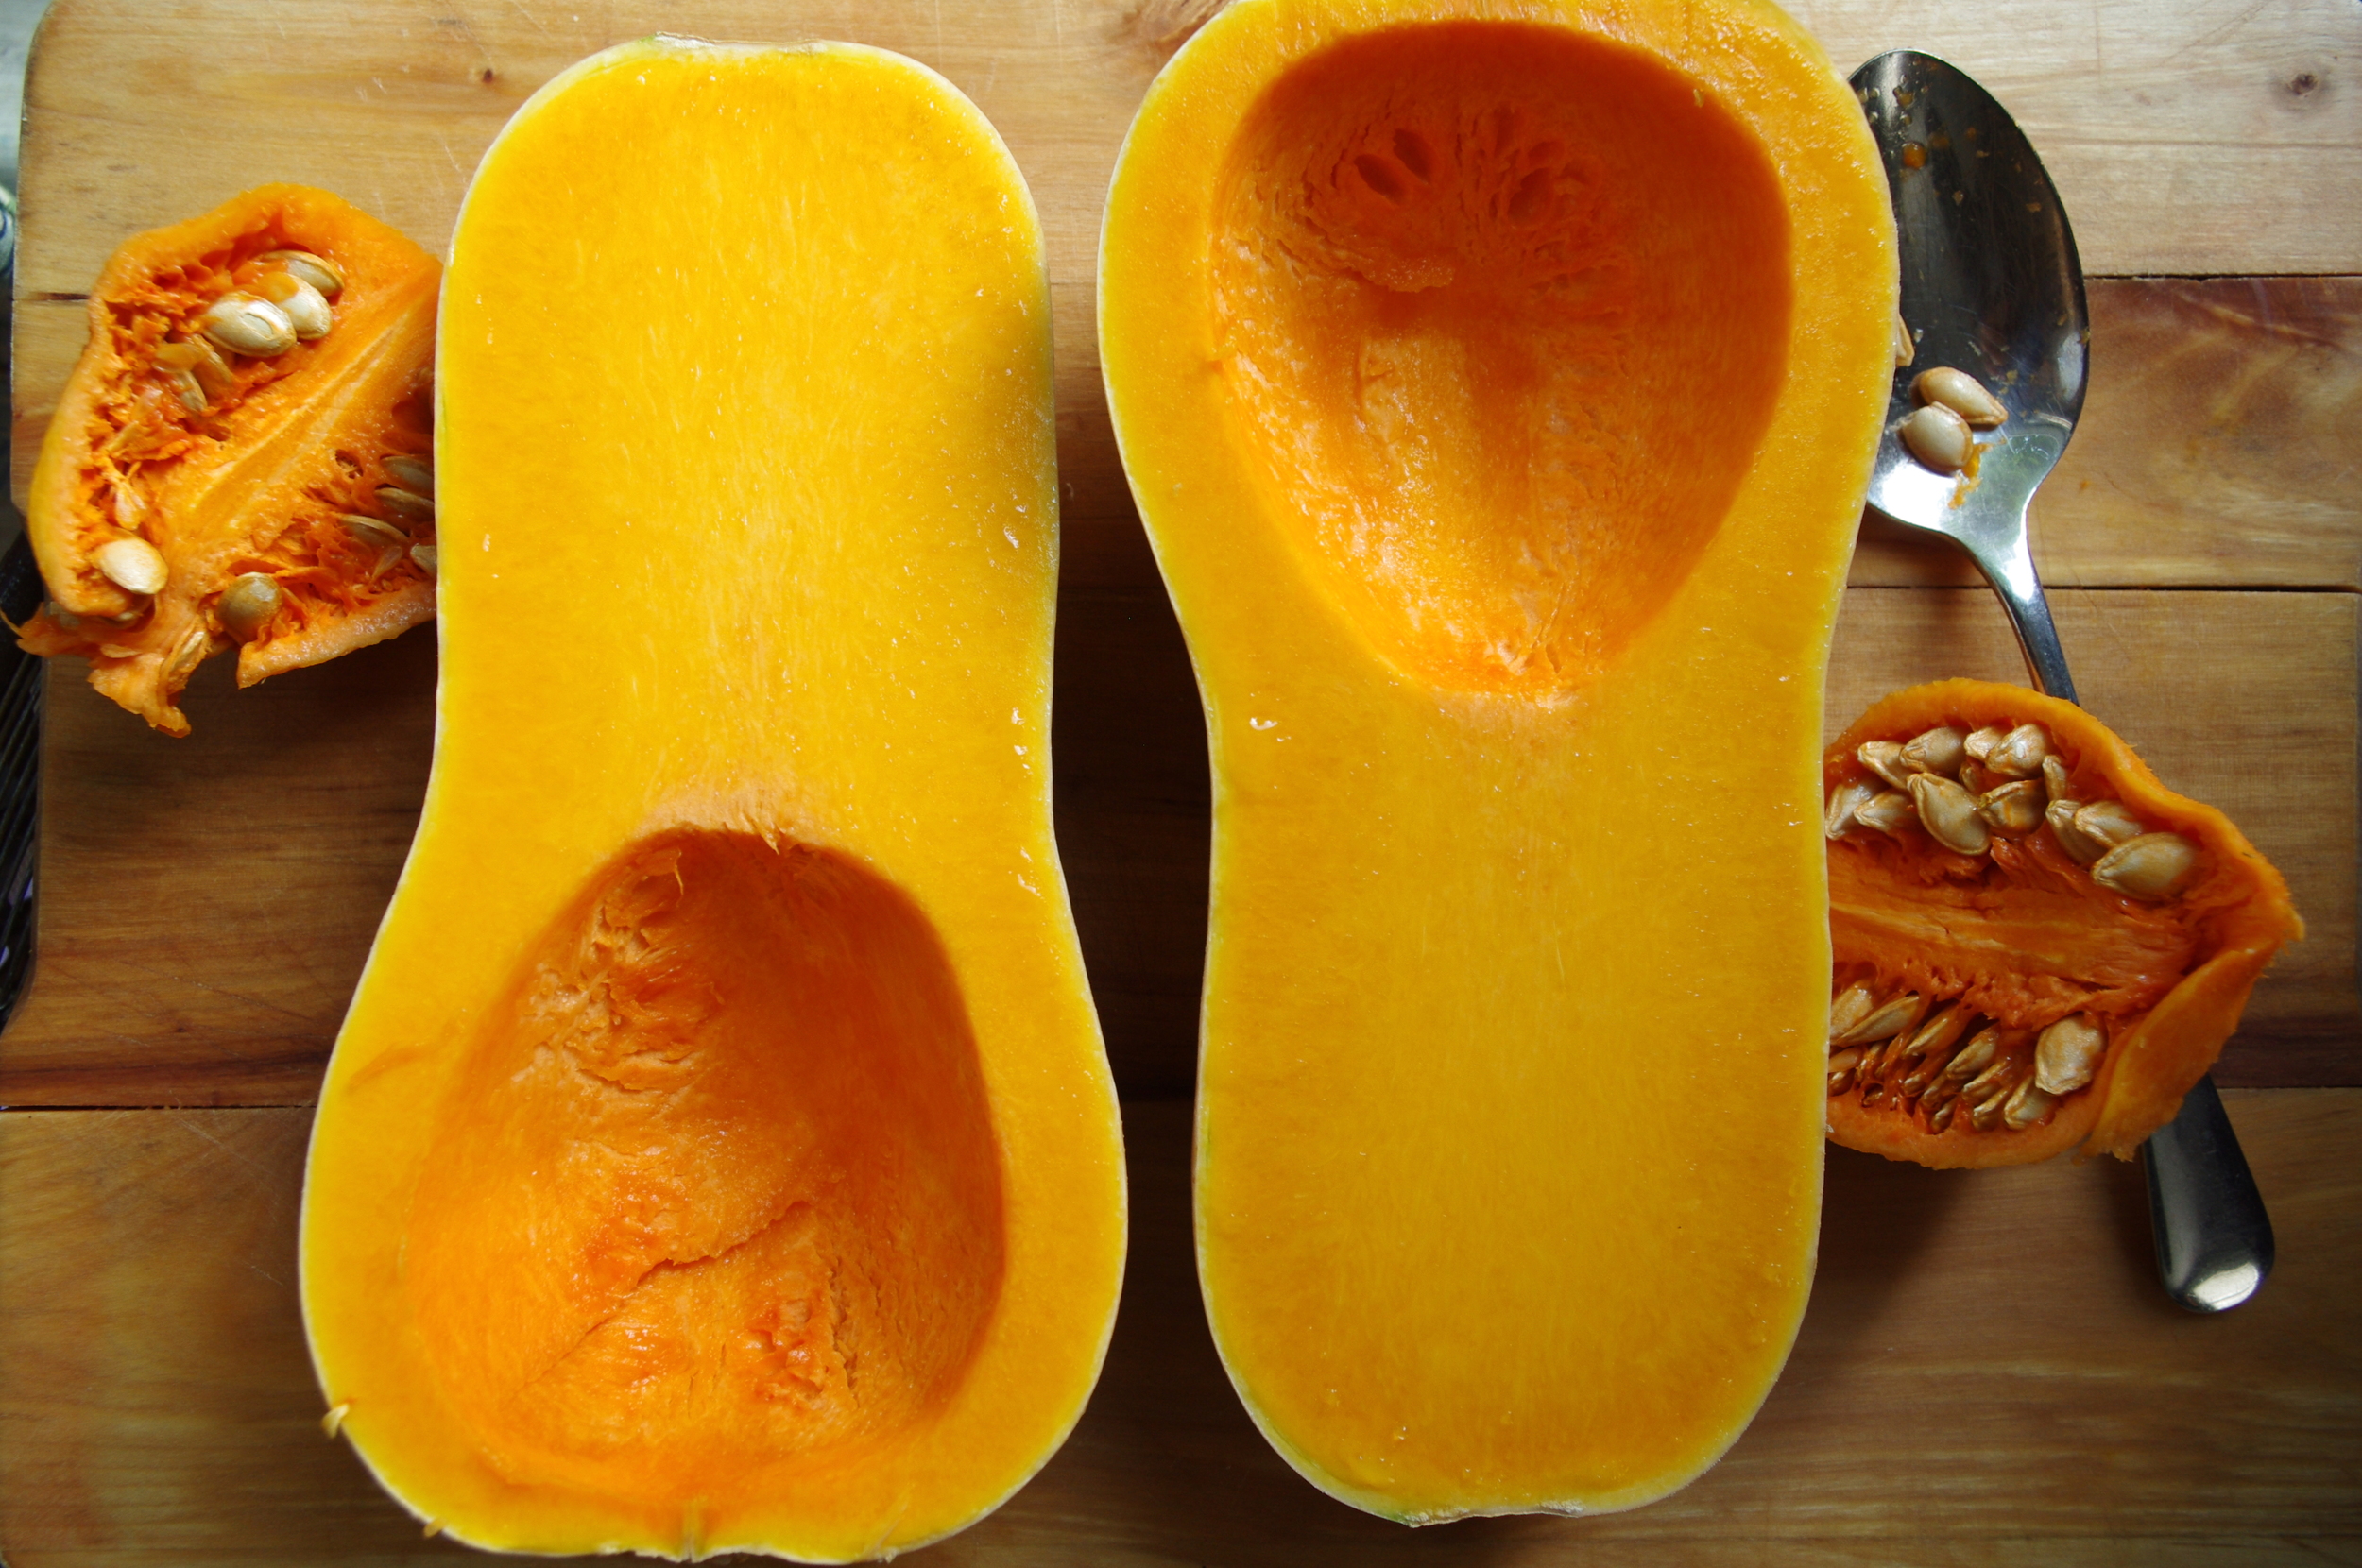
Cut squash in half lengthwise.  Scoop out seeds with a spoon.  Brush cut sides with a little oil and place cut side up or down (up to dry the squash more, down to caramelize the edges and have a more wet puree). Bake at 400 degrees for 45 to 90 minutes or until the squash begins to shrivel and is soft when the fork is inserted.  Remove from the oven and let cool.  Scoop out the squash, or pull the blistered skin away from the pulp.  Discard the skin. Place the squash in a blender and puree to the desired texture.

IMGP9569

Steamed:

Cut ends off the squash, then cut in half crosswise.

IMGP9565

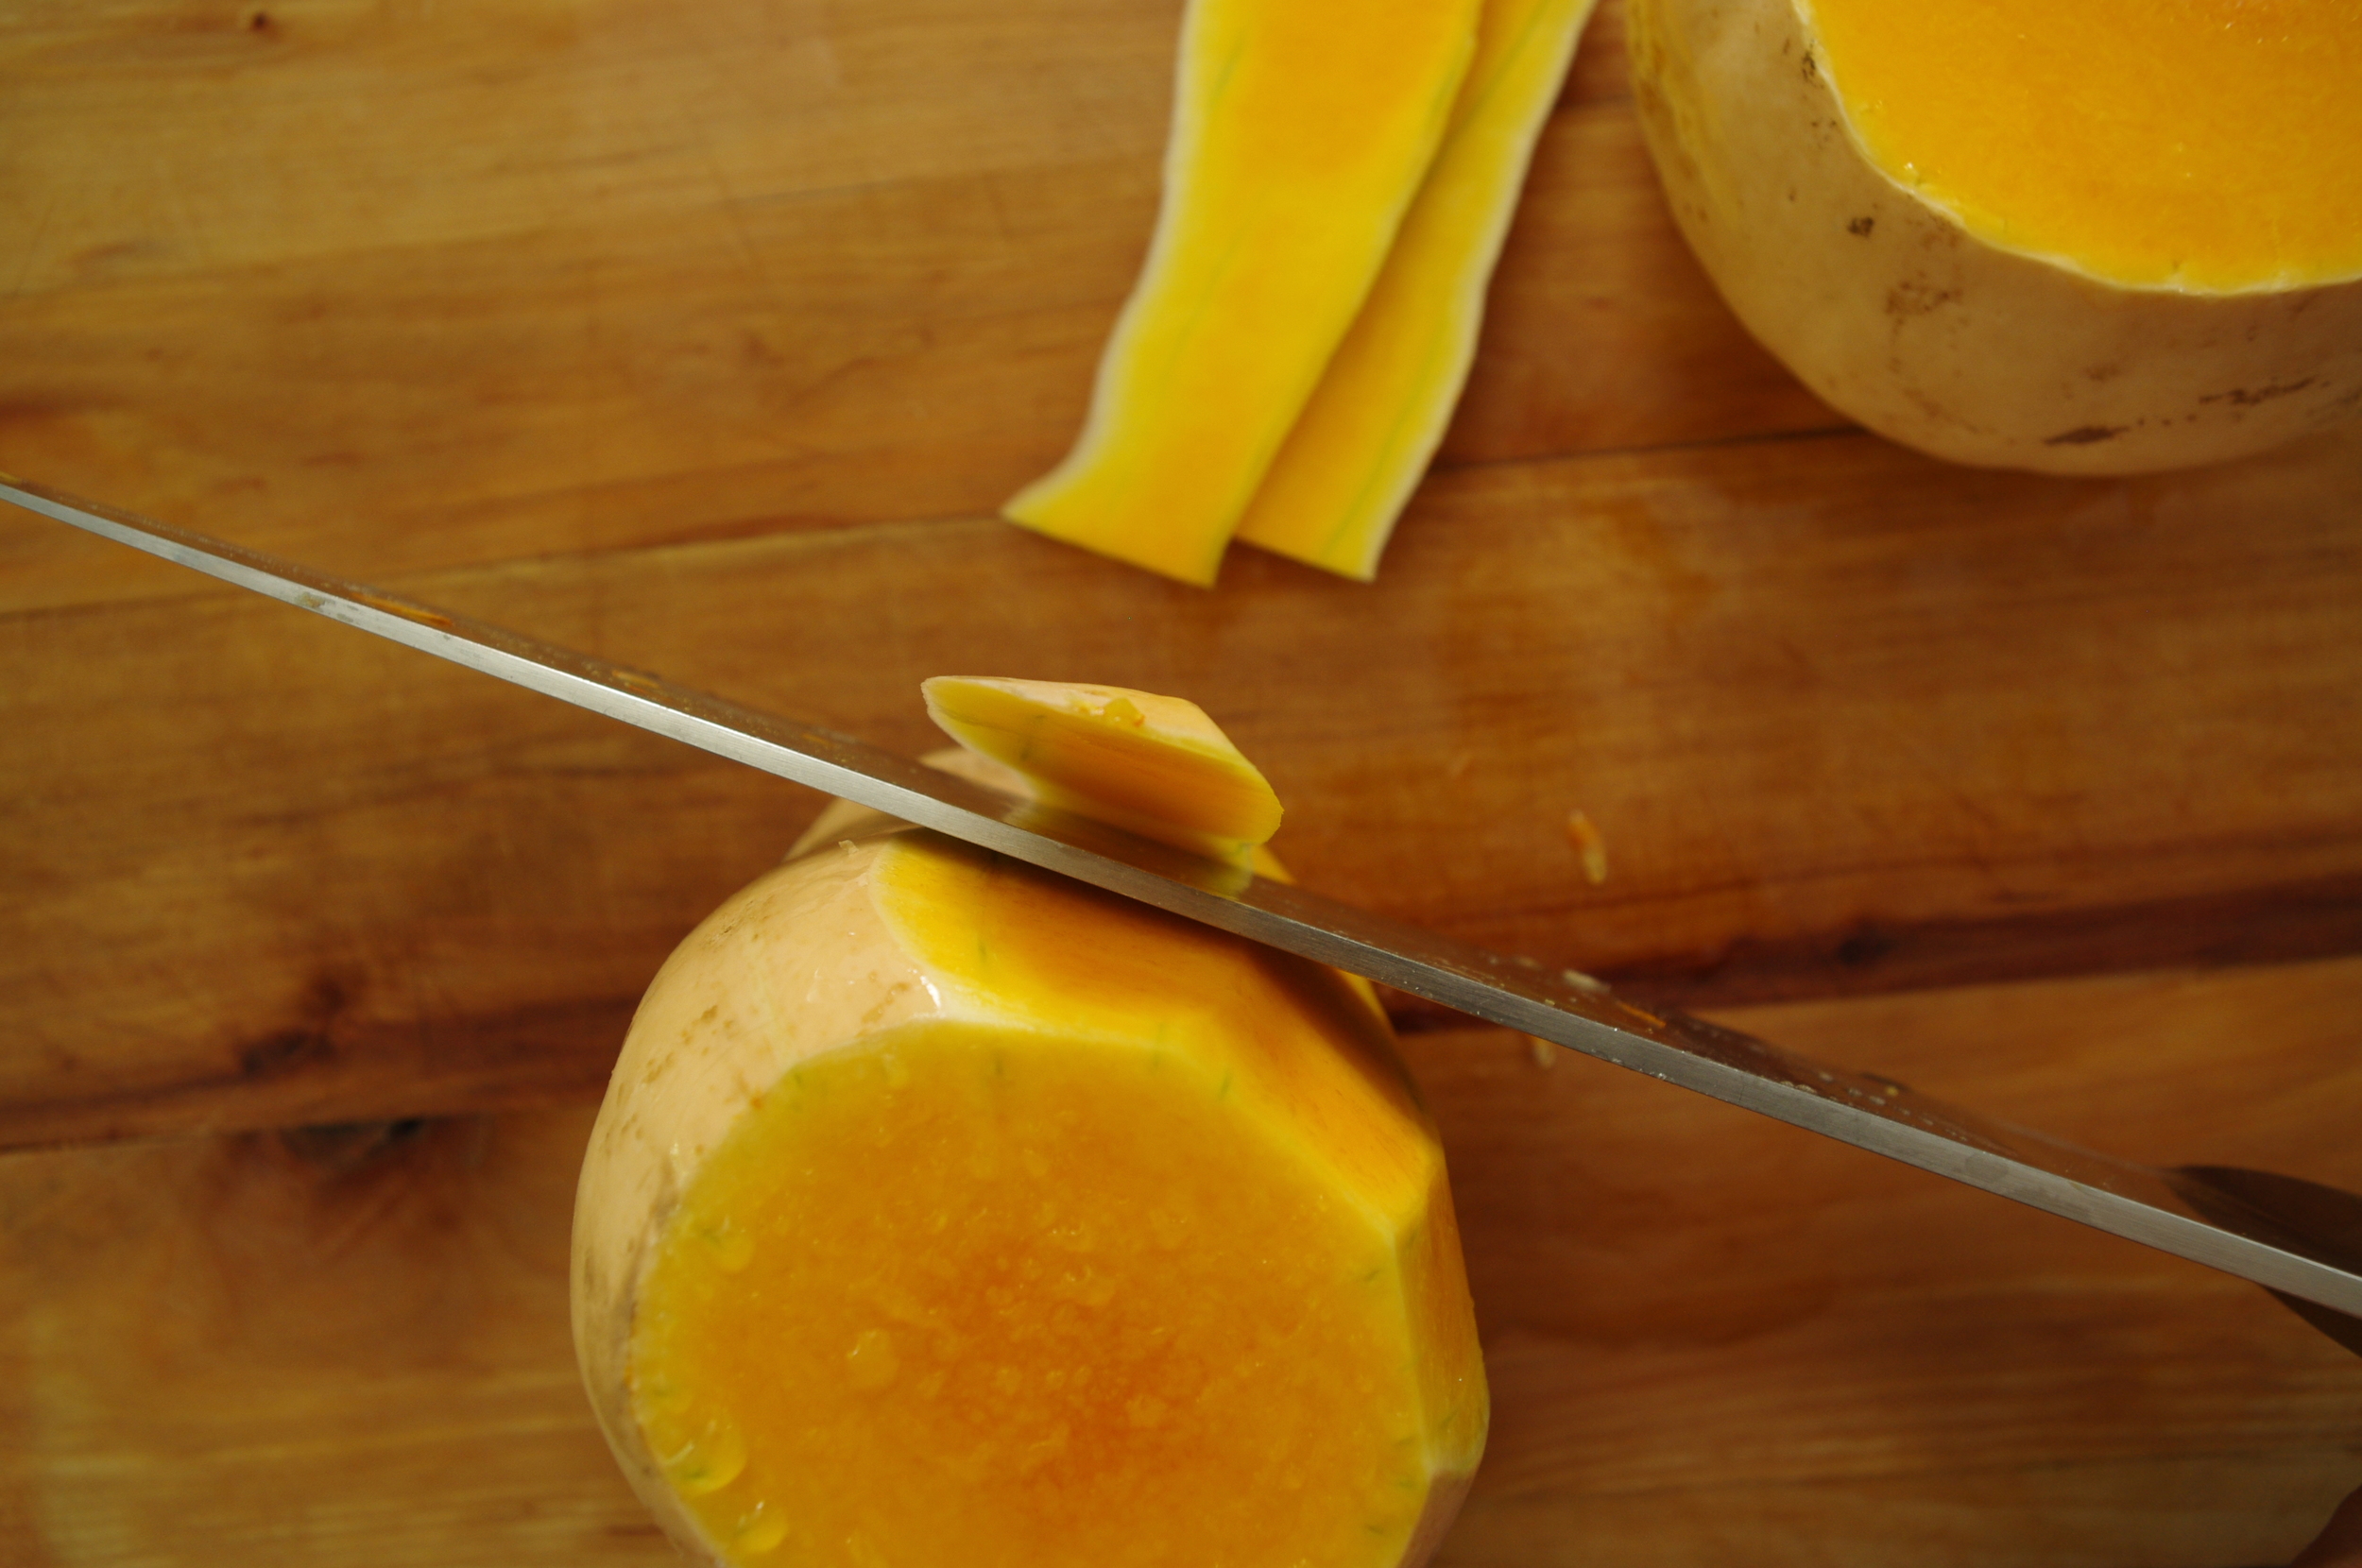
With the widest cut side down, remove the skins by carefully slicing from top to bottom, working your way around the sides. When the skins are removed, scoop out the seeds and discard.

IMGP9566

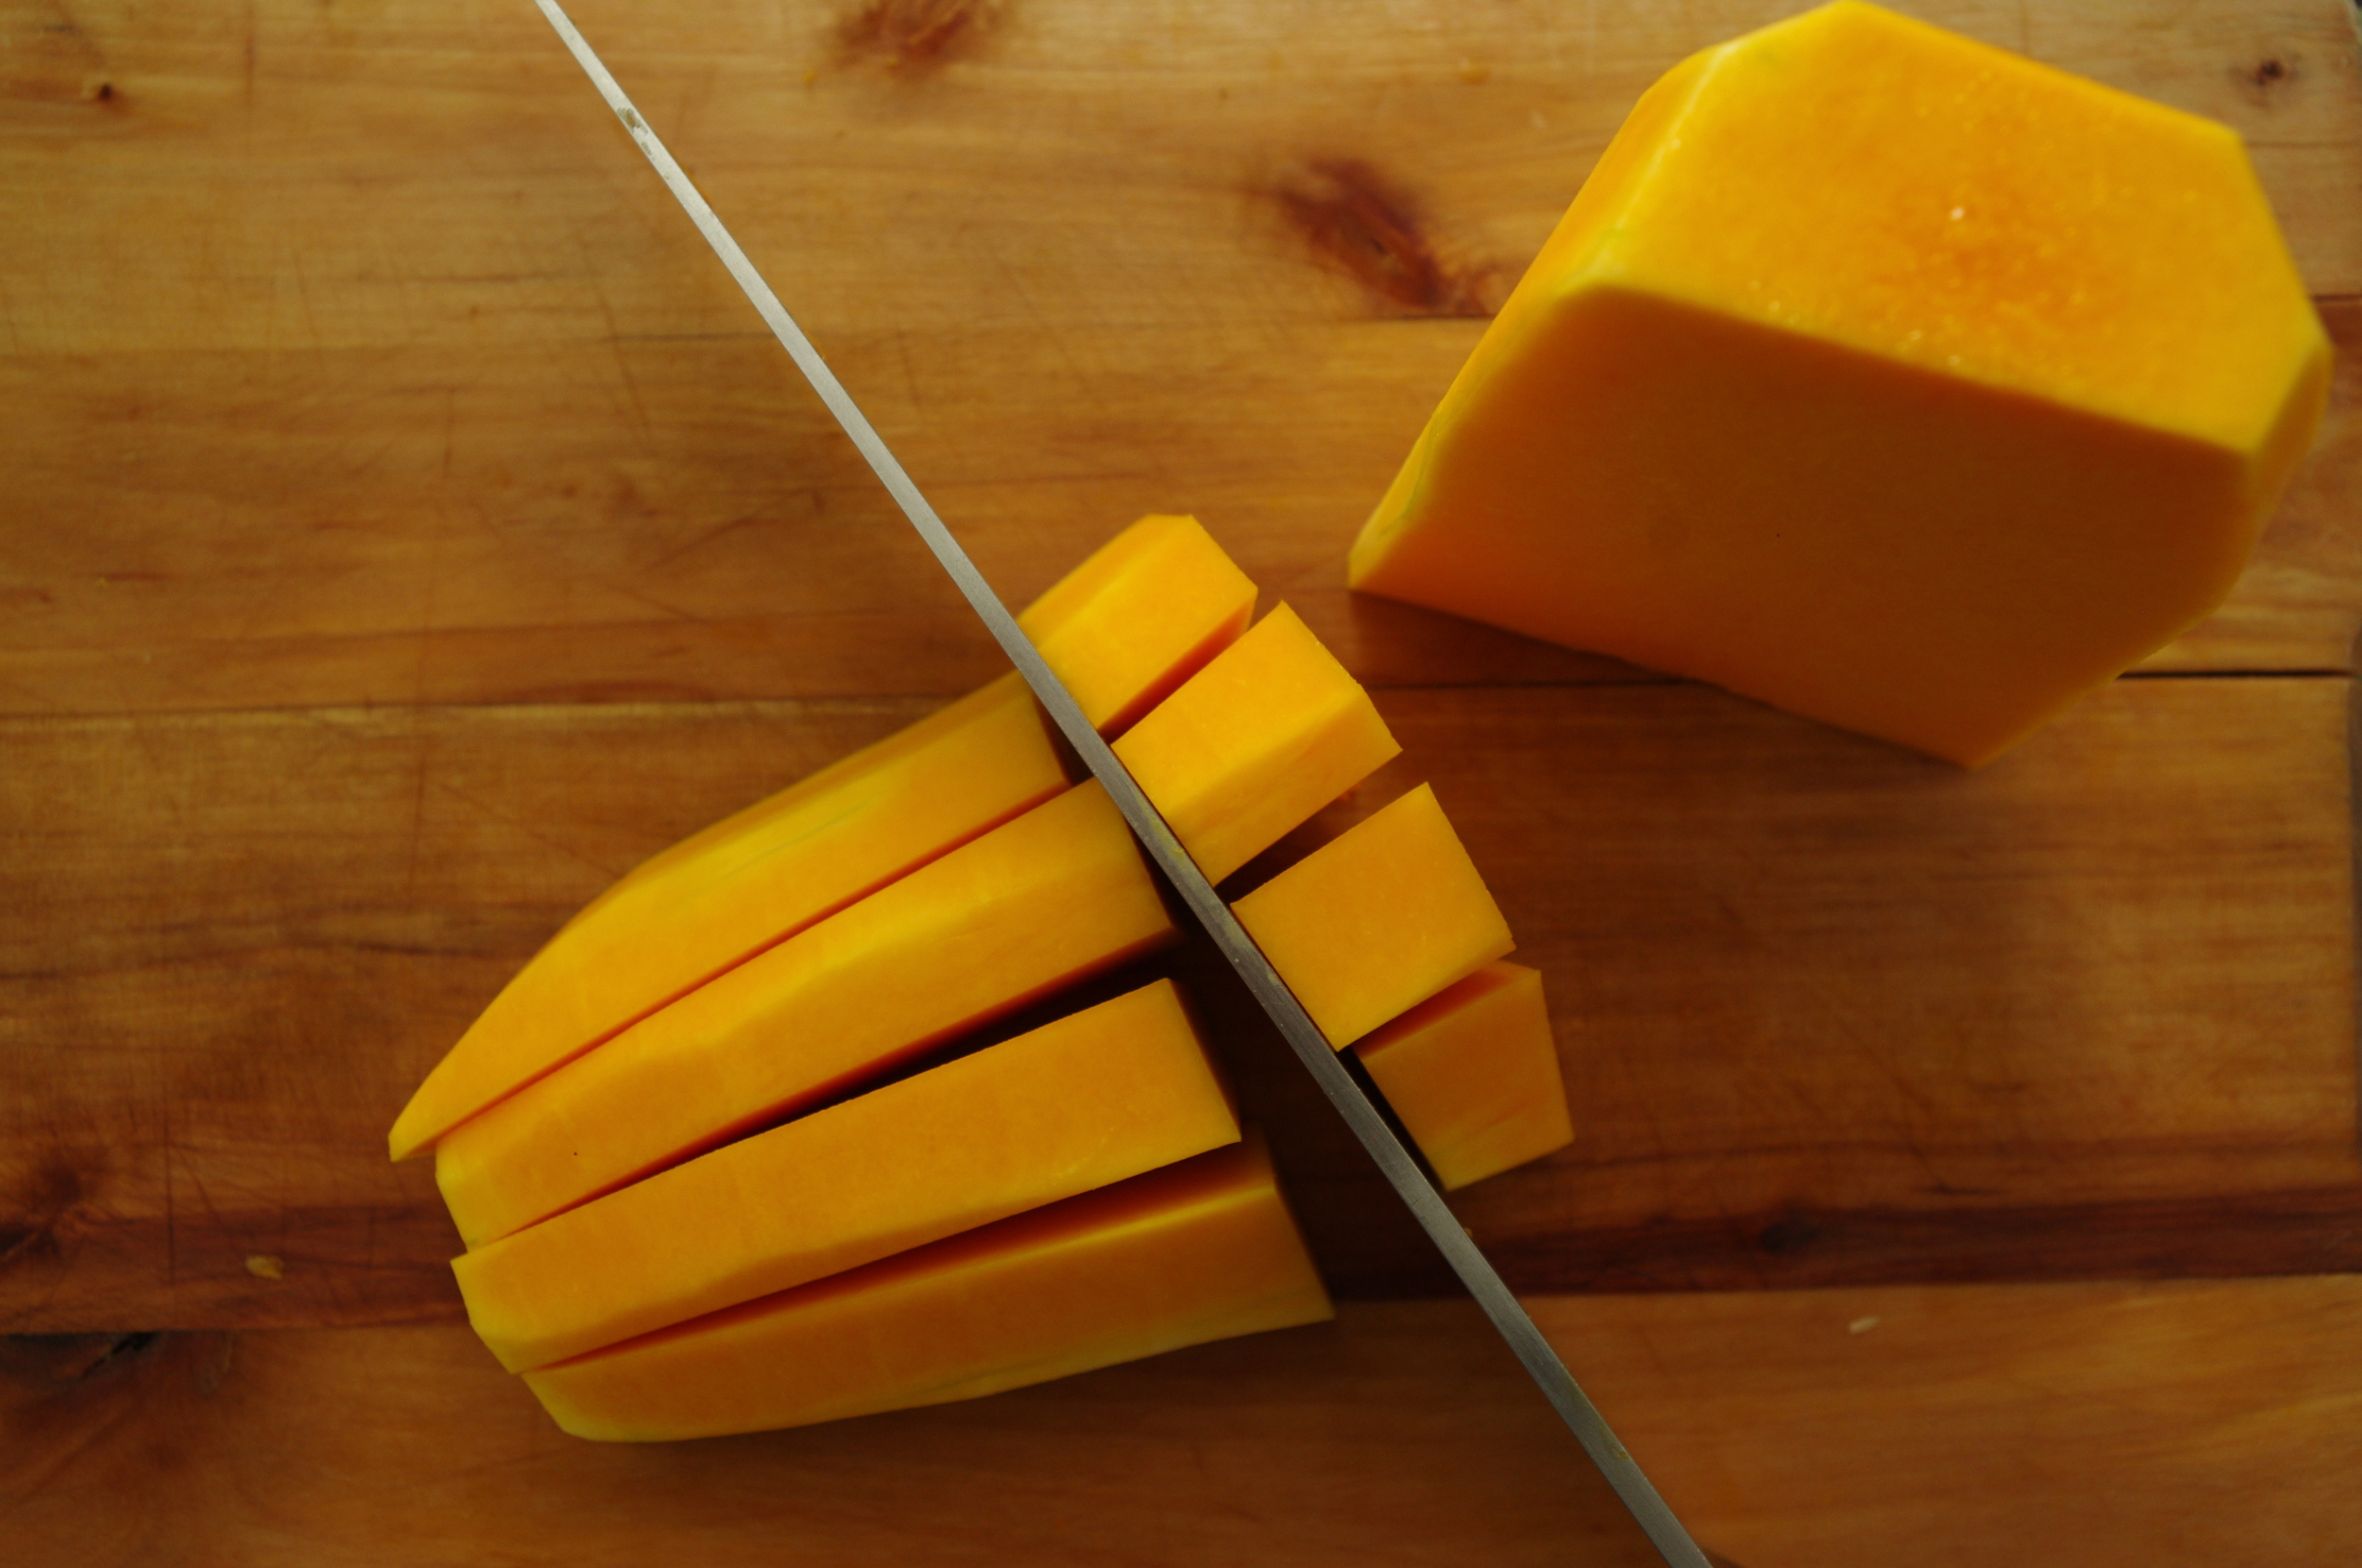
Cut the squash into 1/2 inch cubes.

IMGP9568

Place the squash in a steamer basket inside a large sauce pan.  Put 1-2 cups of water in the bottom of the pan and cover with a lid.  Turn heat to medium-high and steam until the cubes of squash are soft. Remove from heat and let cool.  Puree with a blender to the desired texture.

Roasted:

Follow directions above for removing the squash skins. Cut into 1/2 inch cubes. Place on a baking tray or large casserole dish and coat with a little oil. Sprinkle a little kosher salt and dried spices on the squash and bake in the oven at 400 degrees for about 1 hour, or until the edges turn dark brown and caramelize a bit.   This method will produce the driest result, but the most flavor. From here you can mash, puree in a blender, or simmer in another liquid like milk, juice or broth to re-hydrate before turning into a puree. Caramelizing the squash adds richness and concentrated sweetness, allowing you to reduce any added sugars (if any) to your recipes.

IMGP9573


Now that you have your squash puree, here are a few tasty winter squash recipes for you to try:

Moroccan Spiced Red Lentil Soup

Ann Keener's Butternut Squash Galettes

Coconut Butternut Squash Pie

Roasted Butternut Squash Baked Custard

Butternut Squash Buttermilk Waffles


A Taste of What's to Come

IMGP8201.jpg

In a recent edition of Chatter Magazine, food writer Beth Kirby shared stories and recipes from a few local ladies who are shaping the character of local farming. Signal Mountain Farm's McLean Miller and Chyela Rowe were part of that story.  As we get ready for the first spring harvest, we wanted to share this recipe to get your mouth watering for what's to come in the 2013 CSA season.  CSA members and those who have signed up for our newsletter will be receiving emails with delicious recipes tailored specifically to each week's harvest. We will post those recipes here.  So come visit our website often, browse through the archives for other ideas, and feel free to share your ideas and kitchen successes on our facebook page.

Warm Roasted Spring Vegetable Salad

Ingredients:

1 bunch baby beets (or 2 medium sized beets), plus greens

2 small or one large kohlrabi, plus greens

1 large or 2 medium fennel bulbs

Canola or olive oil

Sea salt & freshly ground black pepper


Garnish & Dressing:

1 lb Link Forty One Sorghum Baconage (thawed)

2 garlic cloves, thinly sliced

1 heaping teaspoon Sequatchie Cove Farm sorghum syrup

3 Tbs white balsamic vinegar

Freshly ground black pepper

Drippings from cooked baconage

Sequatchie Cove Creamery blue cheese (optional)


Method:

Preheat oven to 375 degrees.

Trim leaves from the beets, kohlrabi, and some fennel leaf if desired. Place the leaves in a salad spinner, clean sink or large bowl.  Cover with cold water, give them a swish with your hand to loosen any soil, then let rest in the cold water for a few minutes to let the soil settle.

Meanwhile, wash and trim the kohlrabi, beets and fennel. Slice thinly with a sharp knife or mandolin slicer. Arrange the vegetables in an ovenproof casserole dish. You can arrange them neatly, alternating beets, kohlrabi, and fennel in a repeating pattern if you want an attractive presentation.  Otherwise, just toss them all together with some oil, and season to taste with salt and pepper.  Bake for about 45 minutes, or until the vegetables are tender and beginning to caramelize on the tips.

While the vegetables are baking, prepare the baconage and dressing.  Remove the sausage casing from the baconage with a knife or kitchen shears.  Slice or crumble the baconage into a heated cast-iron skillet or heavy-bottomed skillet. Cook until browned, then remove from the pan and set aside, (but leave the drippings or fat rendered from the cooked baconage in the skillet.) Add the garlic, sorghum syrup and vinegar to the skillet. Stir until combined and cook until it begins to bubble.  Remove from the heat and let rest.

When the vegetables are out of the oven, remove the beet and kohlrabi greens from the cold water and spin dry or pat with a clean, absorbent cloth.  Put a little oil and the greens in a large skillet and sauté until they darken in color and just begin to wilt.  Add the warm vinaigrette and sauté for one minute.  Season to taste with salt and pepper.  Place a portion of greens on each plate, topping with baconage and crumbled blue cheese.  Serve warm as a salad, or use as a topping for garlic-herbed pasta or rice.

Turnip Gratin Dauphinois

IMGP6514.jpg

Rich and creamy dishes are not typical on this blog, but as the end of the growing season is here and the holidays approach it seems fitting to celebrate in style. Turnips may or may not top your list of celebratory vegetables. It seems they are on the either love or hate list for most people. So if you are one of the haters, maybe this recipe will persuade you to the other side. Admittedly, I am firmly in the love camp as I have memories of enjoying raw turnips straight out of the garden as a child. You can make this dish with only turnips, or you can mix new potatoes, kohlrabi and turnips. Starchy white potatoes will make the dish more firm, acting as a sort of glue to hold the layers together. So there is plenty of room for creativity and texture preference if you want to adapt to your own taste.

Ingredients:

1 1/2 lb turnips (or a mixture of new potatoes, kohlrabi and turnips) 1 medium yellow onion, cut into very thin half-circles 2 cloves of garlic, minced 1 Tbs butter 1 Tbs all purpose flour 1/2 Rapunzel vegetable bouillon cube (with sea salt & herbs) dissolved into 1 cup boiling water 6 oz goat cheese 1/4 cup dry white wine 1 tsp whole grain french mustard 1 cup shredded aged cheese (like white cheddar or gruyere)

Method:

Slice turnips (and potatoes and kohlrabi if using) very thinly with a sharp knife or mandolin slicer. Layer them with the onions in a 2qt casserole dish. You can place them in evenly and neatly if you like, but it's not necessary. I just tossed them all together, making sure they were fairly flat and well inside the dish. Whisk together the other ingredients (except the cheese) and pour over the top of the vegetables. Cover with foil and place in the oven at 325 degrees. Bake for about 45 minutes to one hour. Remove the foil and sprinkle the shredded cheese over the top. Return to the oven and bake (uncovered) for about 20 minutes, or until the top is golden brown. Let rest for 5 minutes before serving.

Kale & Wild Mushroom Roulade

IMGP6491.jpg
Pottery courtesy of Emerson Burch

I discovered this recipe nearly 15 years ago, in a charity cookbook from Leeds, England that helped to fund improvements to a soup kitchen.  The book is called More Than A Meal: A Cookbook In Support Of The Homeless.  Many of the recipes are from famous chefs, celebrities and politicians.  Some were humorous, like Rowan Atkinson's Baked Beans on Toast, and John Cleese's recipe for cornflakes: "Buy a packet of cornflakes.  Open the cardboard box...pour some of the contents in a bowl...etc." But this one from Janet Gibson at St. George's Church, was not only beautiful, it is delicious.  Her recipe called for spinach, but as we have loads of greens this time of year, I thought I would try an adaptation.  The texture is not as soft with kale as it is with spinach, but the kale provides a lot of structure and therefore is easier to roll.  Either way, it is a tasty and beautiful way to eat your greens.

Ingredients: 1 lb kale, or mixed broad leafy greens 4-5 eggs, separated 1 Tbs white balsamic vinegar 2 Tbs butter, melted 1/4 cup shredded Parmesan cheese Sea salt and pepper 6 oz locally grown shiitake mushrooms, or a mixture of wild mushrooms, sliced 10-12 oz fresh goat cheese (can substitute sour cream and reduce the vegetable broth to 1/4 cup) 1/2 cup vegetable broth Canola oil 2 garlic cloves, crushed

Method: Preheat oven to 400 degrees.  Line a 12 x 18 jelly roll pan with greased parchment paper, then set aside. Wash and remove stems from the greens.  Blanch in a pot of boiling water for about 1 minute, or until they are wilted and bright green.  Remove from the water and drain or squeeze any excess water from the greens.  Chop very finely.  In a large bowl, mix together the chopped greens, egg yolks, vinegar, melted butter, parmesan cheese, sea salt and pepper.  Whisk the egg whites until soft peaks form.  Gently fold the egg whites into the mixture of greens until the mixture is evenly combined.  Pour the mixture into the lined jelly roll pan.  With a second piece of parchment paper, press the greens into the pan until you have an even layer and there are no holes or gaps.  Remove the top piece of parchment and place in the oven.  Bake for 10-15 minutes, or until the egg has set and the greens feel slightly spongy to the touch.

While the greens are baking, saute the sliced mushrooms in a pan with a little oil. When they begin to brown, add the goat cheese, broth, and garlic.  Stir over medium heat until combined well and warmed through. Set aside.  When the greens are finished baking, remove from the oven and place a clean cotton tea-towel over the greens.  Then place a large cutting board or a second jelly roll pan of the same size on top.  Holding the two firmly together, turn upside down to turn the greens out.  Remove the hot jelly roll pan, then gently remove the parchment paper from the greens.  If it sticks in any areas, use a sharp knife to separate the parchment without tearing a hole in the greens.  While the greens are still hot and steamy, use the tea towel (which is now underneath the greens) to gently roll the sponge (rolling the towel along with the greens).  This will allow the sponge to create some memory, and helps to prevent cracking.  Let rest for a few minutes.  Gently unroll and spread the mushroom mixture onto half of the greens, starting with the centermost side.  Roll again, adding more filling if necessary.
When it is a log shape, slice into pinwheels and serve immediately.  If it has cooled, then gently wrap the roll in foil before slicing and return to the oven to warm through.